Why Most First Reef Tanks Fail (and How to Avoid It)
Starting a reef tank is exciting, but it can also be expensive and frustrating when expectations are unrealistic. Most beginner failures happen for three reasons: adding livestock too quickly, changing too many variables at once, and buying equipment without a clear plan. This guide gives you a step-by-step 90-day setup process so your first reef tank becomes stable, predictable, and genuinely enjoyable.
The core principle is simple: stability beats perfection. You do not need perfect numbers every day. You need a repeatable routine, clean source water, adequate flow and lighting, and slow stocking decisions. If you follow this framework, you can build a healthy reef that supports fish, inverts, and beginner corals with confidence.
Step 1: Pick the Right Tank Size and Goals
Small tanks are popular because they look affordable upfront, but they are less forgiving. A 20-gallon tank can work, but most beginners succeed faster with 40–75 gallons because water chemistry swings more slowly. Before purchasing anything, define your near-term goal:
- Fish-first with soft coral later (easiest)
- Mixed reef with soft corals and a few LPS such as torch or hammer
- SPS-dominant (not recommended for a first 90 days)
If your goal is a mixed reef, choose dimensions that allow easy aquascaping and flow distribution. Long tanks are easier to light evenly. Deep tanks are harder for beginners because PAR drops quickly toward the bottom.
Step 2: Build a Simple, Reliable Equipment Stack
You do not need premium everything. You do need dependable basics:
- RO/DI water source: never skip this. Tap water introduces nutrients and contaminants.
- Heater + controller: aim for 77–79°F and avoid big swings.
- Return pump and circulation pumps: prioritize consistent flow and dead-spot elimination.
- Protein skimmer: optional in very small systems, highly recommended in most beginner reefs.
- Lighting: choose a fixture with a proven schedule and avoid daily tinkering.
- Auto top-off: one of the best quality-of-life upgrades.
For equipment shopping and real-world pricing, use ReefBay’s marketplace and compare options from trusted sellers: skimmer, light, and pump.
Step 3: Aquascape for Flow, Maintenance, and Coral Growth
New hobbyists often stack rock against the back wall and create detritus traps. Instead, build with maintenance in mind. Leave space around structures so you can siphon, scrape glass, and improve circulation. A practical layout has at least two islands or a single open arch with pass-throughs for flow.
Use enough rock for biological filtration, but don’t overpack the display. You want fish swimming room and future coral placement options. Keep sand depth shallow unless you intentionally build a deep sand bed system.
Step 4: Start the Cycle Correctly
Cycling means building nitrifying bacteria that convert ammonia to nitrite and then nitrate. It does not mean your tank is ready for full stocking immediately. Dose an ammonia source, seed bacteria, and test consistently. A good beginner cycle process:
- Fill with mixed saltwater made from RO/DI.
- Heat and circulate for 24 hours.
- Add bacteria product and ammonia source.
- Test ammonia/nitrite every few days.
- Wait until ammonia processes within 24 hours.
Do not rush this stage. The first win in reef keeping is patience, not purchases.
Step 5: Week-by-Week 90-Day Stocking Roadmap
Days 1–14: Foundation
Focus only on stability: salinity 1.025, temperature 77–79°F, and strong flow. No fish yet unless your cycle process is complete and verified. Practice testing and top-off routines now, before livestock is at risk.
Days 15–30: First Cleanup Crew
Add a modest cleanup crew based on visible algae, not a random package. Start with a few snail options and maybe one or two crab if compatible with your plan. Overloading inverts too early causes starvation.
Days 30–45: First Fish
Add one hardy fish pair or a single fish depending on tank size and quarantine approach. Good beginner choices include clownfish and certain goby. Feed lightly, watch behavior, and keep nutrient export balanced.
Days 45–60: Additional Fish + Stability Checks
Add one fish at a time with at least 10–14 days between additions. This spacing helps your biofilter adapt and lets you catch aggression early. Continue weekly testing: alkalinity, nitrate, phosphate, salinity, and temperature trends.
Days 60–90: First Corals
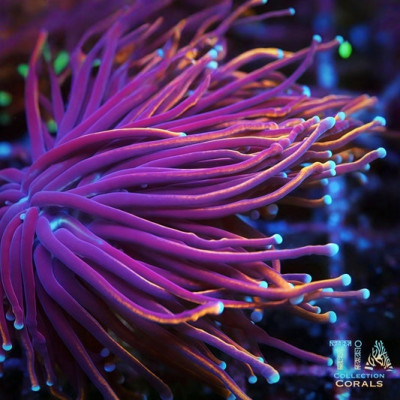
Start with hardy options: zoa, mushroom, or leather corals. Place frags based on light and flow requirements. Resist the urge to buy delicate SPS too early. A stable mixed reef grows from consistency, not speed.
Step 6: Target Water Parameters for Beginner Success
- Salinity: 1.025 (keep stable)
- Temperature: 77–79°F
- Alkalinity: 8–9 dKH
- Calcium: 400–450 ppm
- Magnesium: 1250–1400 ppm
- Nitrate: 5–20 ppm for most mixed reefs
- Phosphate: 0.03–0.10 ppm
Beginners often chase ultra-low nutrients and starve corals. Moderate nutrients with stable alkalinity usually outperform “sterile” systems in the first year.
Step 7: Maintenance Routine That Actually Works
A sustainable routine beats heroic effort. Use this cadence:
- Daily: check temperature, ATO reservoir, and fish behavior.
- 2–3x weekly: inspect pumps, remove detritus pockets, clean glass.
- Weekly: test alkalinity, nitrate, phosphate; perform a small water change.
- Monthly: deep-clean pumps, verify heater calibration, review stocking plan.
If you want fewer mistakes, track parameters over time inside the ReefBay app: download the app. Trendlines make decisions easier than memory-based reefing.
Step 8: Feeding Strategy and Nutrient Balance
Overfeeding is one of the most common beginner problems. Start with smaller portions, target feed where needed, and observe actual consumption. If nutrient levels climb, reduce frequency first before buying more hardware. If nutrients bottom out, increase feeding gradually or reduce export intensity.
For pod-dependent fish and biodiversity support, add cultured copepod and occasional phyto dosing based on tank response.
Step 9: Common Mistakes and Fast Corrections
Mistake: Constantly changing light schedule
Fix: Set a stable photoperiod and intensity for 2–3 weeks before adjusting.
Mistake: Big chemistry corrections in one shot
Fix: Make smaller corrections over multiple days, especially alkalinity.
Mistake: Buying “problem solver” livestock blindly
Fix: Confirm root cause first. Not all algae problems are solved by one grazer.
Mistake: Ignoring quarantine/biosecurity
Fix: Use dip and quarantine protocols where possible to reduce disease and pests.
Step 10: When to Upgrade and When to Wait
Upgrade only when you can state the exact bottleneck. If evaporation swings salinity, add ATO. If nutrients stay high despite good habits, optimize export and feeding before buying more devices. If coral growth stalls, verify alkalinity and PAR consistency before blaming trace elements.
In reef keeping, unnecessary complexity creates hidden failure points. Add tools when your data and experience justify them.
Beginner Buying Checklist (Practical and Budget-Aware)
- RO/DI source and TDS meter
- Reliable heater and controller
- Two circulation pumps for redundancy
- Test kits for salinity, alkalinity, nitrate, phosphate
- Auto top-off system
- Starter cleanup crew from trusted sellers
- Hardy first fish and beginner coral frags
Browse livestock and equipment from verified reef sellers on ReefBay: shop now.
Final 90-Day Success Criteria
At day 90, your reef is on track if:
- Parameters are stable week to week
- Fish are eating and behaving normally
- Corals show extension and gradual growth
- You have a maintenance rhythm you can sustain
- You make fewer reactive changes and more planned adjustments
That’s the real milestone—not owning the most expensive gear. A stable first reef is built through patience, consistency, and smart stocking. If you’re ready to plan your next additions, explore current livestock listings and compare options in one place on ReefBay: browse the marketplace. Then track your tank trends and reminders with the ReefBay app so your progress compounds every week.