A sump is one of the most valuable additions to any reef tank. This secondary tank sits below your display and serves as the heart of your filtration system, housing equipment, increasing water volume, and providing space for advanced filtration methods. If you're considering adding a sump to your reef or setting up your first sump-based system, this guide covers everything you need to know.
What Is a Reef Tank Sump?
A sump is simply a secondary tank connected to your main display aquarium. Water overflows from your display, flows through the sump where it's filtered and processed, then returns to the display via a return pump.
Key benefits of running a sump:
- Increased water volume – More water means more stable parameters
- Hidden equipment – Heaters, skimmers, and probes stay out of sight
- Better gas exchange – The overflow process oxygenates water
- Refugium space – Room for macroalgae and copepod production
- Easy maintenance – Access equipment without disturbing the display
- ATO reservoir – Some sumps include a dedicated ATO compartment
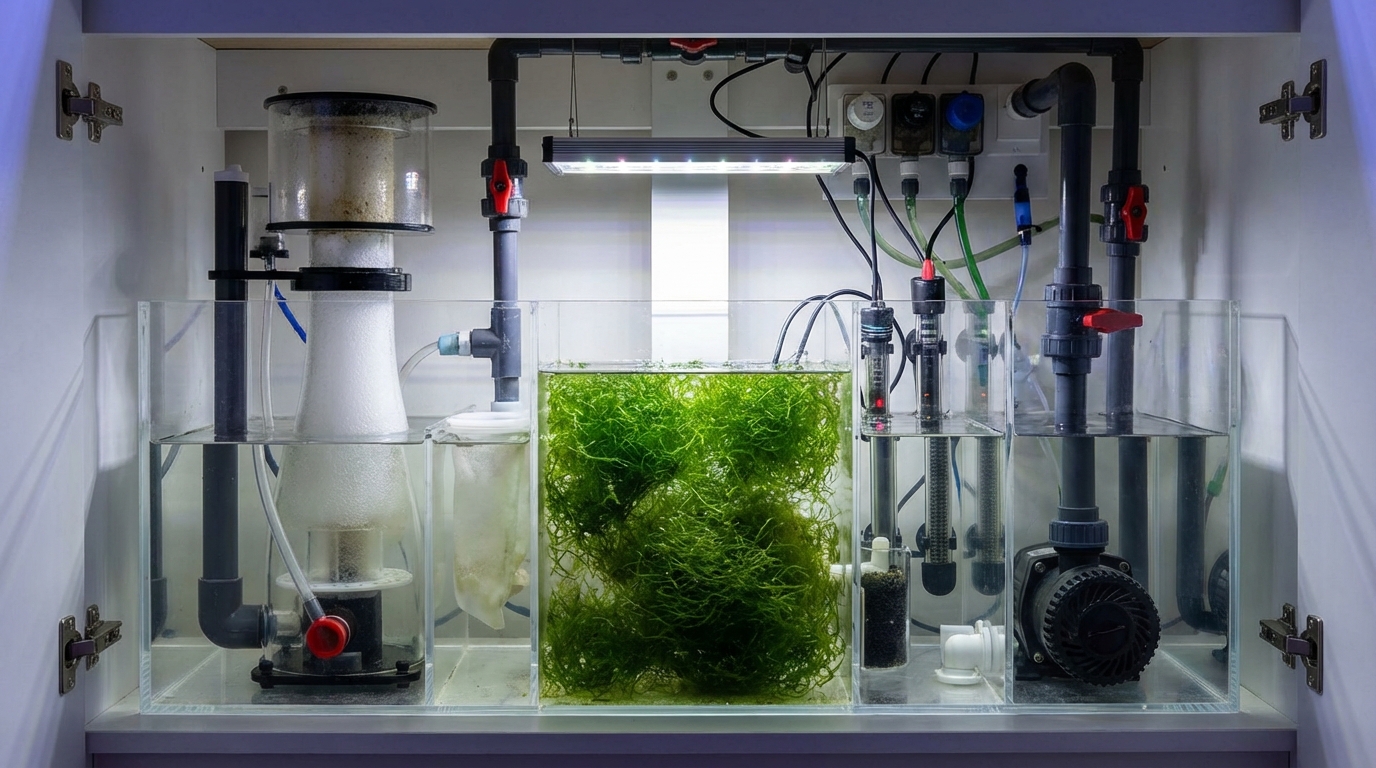
Sump Design and Sections
Most reef sumps are divided into distinct sections using baffles (glass or acrylic dividers). Each section serves a specific purpose:
1. Drain/Skimmer Section
This is where water from your display enters the sump. It's typically the first chamber and houses your protein skimmer. Key considerations:
- Water level must be stable for skimmer performance
- Skimmer section water depth should match manufacturer specs (usually 7-10 inches)
- Filter socks or filter rollers can be placed here to catch debris
- Some designs include a bubble trap after this section
2. Refugium Section (Optional but Recommended)
A dedicated area for growing macroalgae like chaetomorpha. The refugium provides natural nitrate and phosphate export while cultivating copepods. Read our complete refugium guide for details.
3. Bubble Trap
A series of over-under baffles that prevent microbubbles from reaching your return pump. Bubbles rise to the surface while water is forced down, then up, then down again before entering the return section.
4. Return Section
The final chamber where your return pump sits. This section should:
- Maintain consistent water level (evaporation affects this section first)
- House your ATO float switch or optical sensor
- Have enough volume to handle power-off backflow
- Keep the pump submerged at all times
Sizing Your Sump
Bigger is generally better for sumps, but you need to balance capacity with available space. Consider these factors:
Physical Constraints
- Measure your stand's interior dimensions carefully
- Leave room for equipment access and maintenance
- Account for plumbing – drains and returns need space
- Consider future equipment additions
Capacity Guidelines
Aim for a sump that's 20-40% of your display tank volume:
- 50-gallon display: 10-20 gallon sump
- 75-gallon display: 15-30 gallon sump
- 120-gallon display: 25-50 gallon sump
- 180-gallon display: 40-75 gallon sump
Backflow Capacity
Your sump must handle water that drains back when power goes out. All water above your return nozzle and any water in drain lines will flow into the sump. Make sure your return section can absorb this without overflowing!
Essential Sump Equipment
Protein Skimmer
The workhorse of reef filtration. Skimmers remove organic waste before it breaks down into nitrate and phosphate. Size your skimmer for 1.5-2x your total system volume for adequate performance. See our protein skimmer guide.
Return Pump
Choose a pump that provides 5-10x total system turnover after accounting for head loss. DC pumps offer adjustable flow and efficiency advantages. Browse pumps on the ReefBay marketplace.
Heater
Place heaters in the sump to keep them hidden. Position in an area with good flow. Use 3-5 watts per gallon of total system volume.
ATO System
Essential for maintaining stable salinity. The float switch or sensor goes in the return section. See our ATO guide.
Probe Holders
Many reefers mount pH, temperature, and ORP probes in the sump where they're hidden but accessible.
DIY vs. Commercial Sumps
Commercial Sumps
Pros:
- Designed specifically for reefkeeping
- Usually include probe holders and sock brackets
- Consistent water levels between chambers
- Often include refugium lighting provisions
Cons:
- More expensive
- May not fit your exact space
- Limited customization
DIY Sumps
Pros:
- Custom fit for your stand
- Exactly the features you want
- Can be more affordable
- Satisfaction of building it yourself
Cons:
- Requires planning and skills
- Silicone work takes practice
- Design mistakes are costly
Setting Up Your Sump
Step 1: Plan Your Layout
Before adding any equipment, sketch out where everything will go. Consider:
- Where drain lines enter
- Skimmer placement and collection cup access
- Refugium lighting position
- Return pump location and plumbing route
- Heater and probe placement
Step 2: Install Plumbing
Connect your drain lines to the sump. Use unions wherever possible for easy maintenance. Ensure drains dump water at the correct height for your skimmer's requirements.
Step 3: Add Equipment
Install your skimmer, heater, and return pump. Connect the return plumbing to your display. Don't forget to add a check valve or siphon break!
Step 4: Test for Leaks
Fill with freshwater first and run for 24-48 hours. Check all joints, unions, and connections. It's much easier to fix leaks before adding livestock.
Step 5: Calibrate Equipment
Adjust your skimmer water level, set your ATO, and verify return flow. Use the ReefBay app to track parameters as your system stabilizes.
Common Sump Problems and Solutions
Microbubbles in Display
Usually caused by inadequate bubble trap or skimmer breaking in. Solutions:
- Add additional baffles
- Lower skimmer output initially
- Add filter floss to the return section
- Check for air leaks in plumbing
Sump Overflows During Power Outage
Your return section can't handle backflow volume. Solutions:
- Drill a siphon break hole in the return line
- Use a check valve (but don't rely on it alone)
- Lower the return section's operating water level
Inconsistent Skimmer Performance
Water level fluctuation in the skimmer section. Causes and fixes:
- Add an adjustable overflow or gate valve to the skimmer section drain
- Ensure ATO is in the return section only
- Check for flow restrictions
Sump Maintenance
Keep your sump running optimally with regular maintenance:
- Weekly: Empty skimmer cup, clean collection cup neck
- Bi-weekly: Replace or clean filter socks
- Monthly: Check pump impellers, clean probes
- Quarterly: Deep clean skimmer body, inspect baffles and seals
Conclusion
A well-designed sump transforms reef keeping by hiding equipment, stabilizing parameters, and opening doors to advanced filtration methods. Whether you buy commercial or build DIY, take time to plan your layout and size appropriately for your system.
Track your sump's performance and water parameters with the ReefBay app to ensure your filtration system is working at its best.